When I first started restoring vintage fountain pens, one of the first questions I had was “how does this one come apart?” Photos like the ones below helped me a lot.
In some cases, these are photos taken just as the pen came apart, before cleaning…
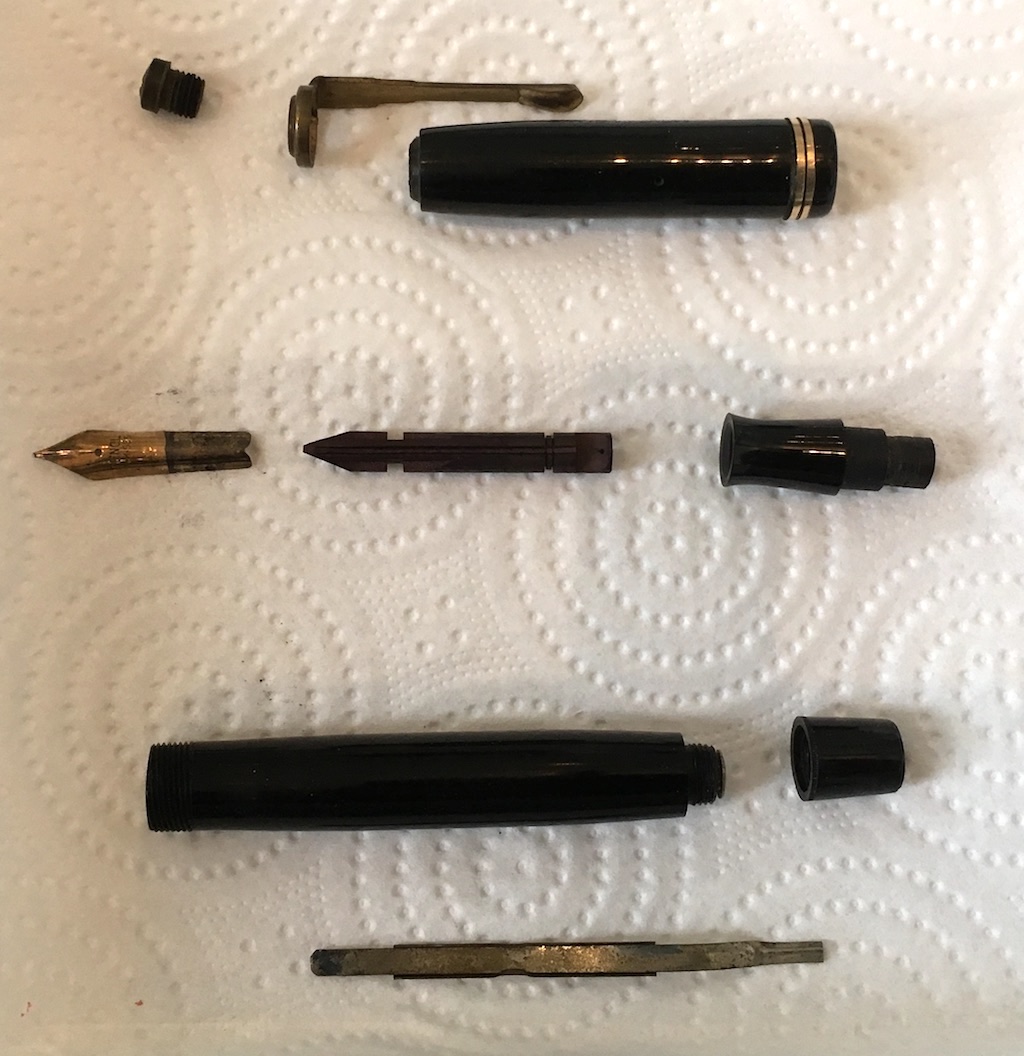
Big Ben
A Big Ben piston filler. Seen in one piece on this page.
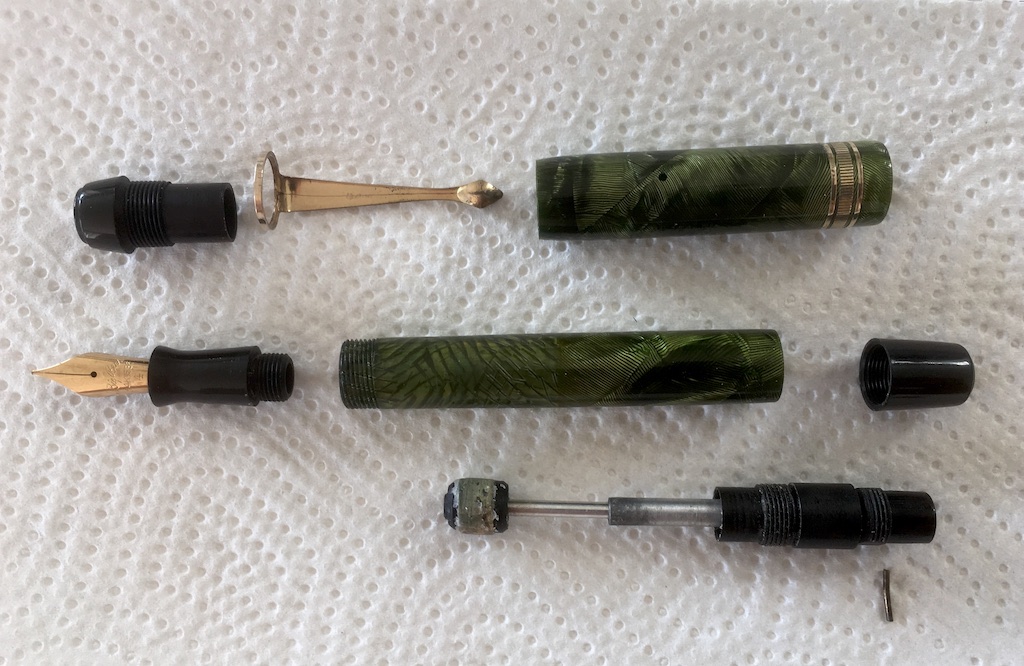
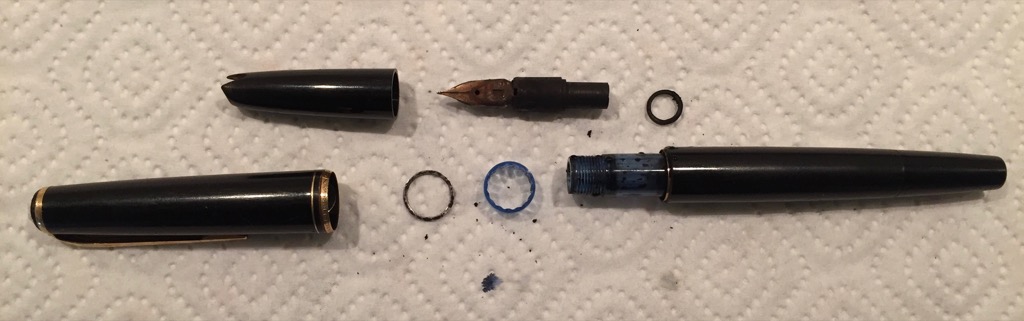
Geha
Geha 780 with a Reserve tank (the small thing sticking out at the bottom of the nib assembly is the opening of the tank into the barrel)
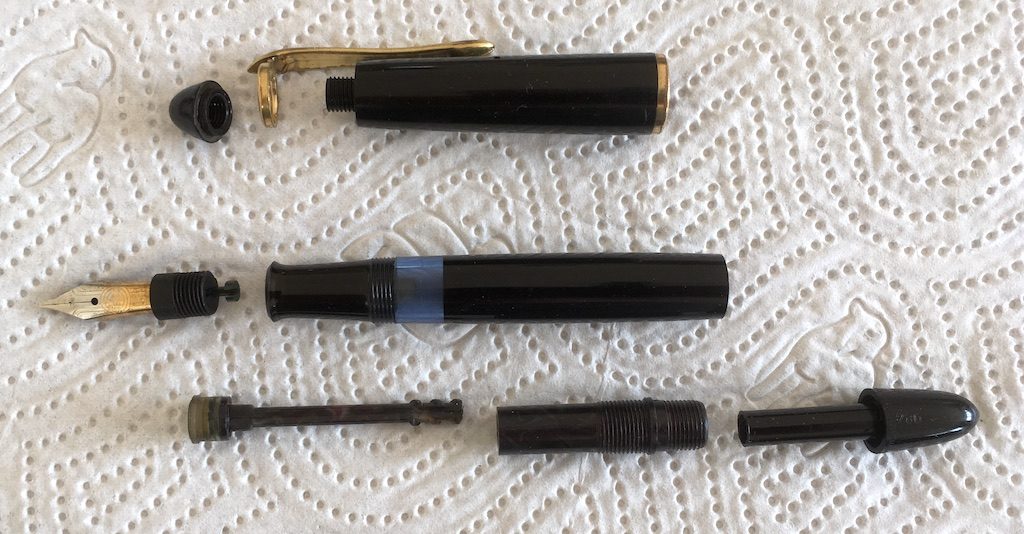
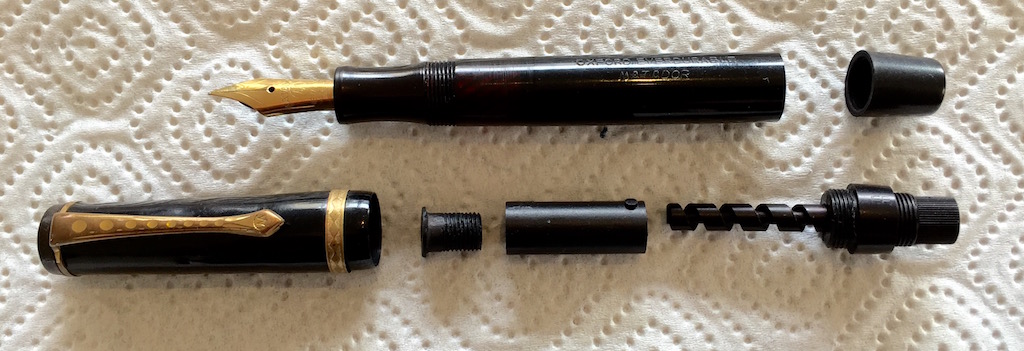
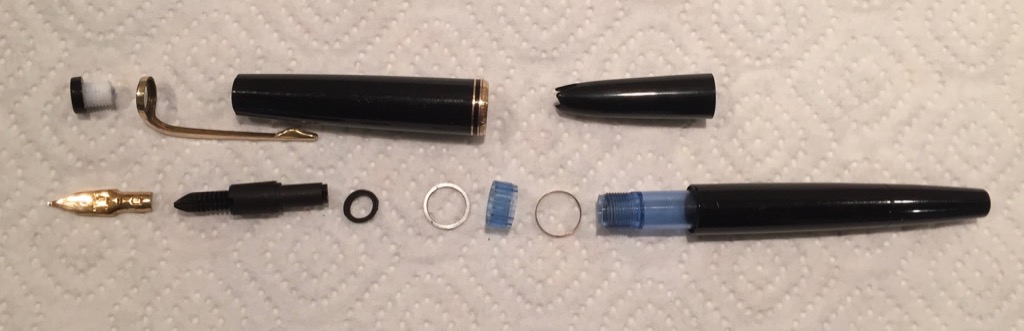
Matador
Matador 76 “Oxford Everdurable” before the piston gasket was put on.
Montblanc
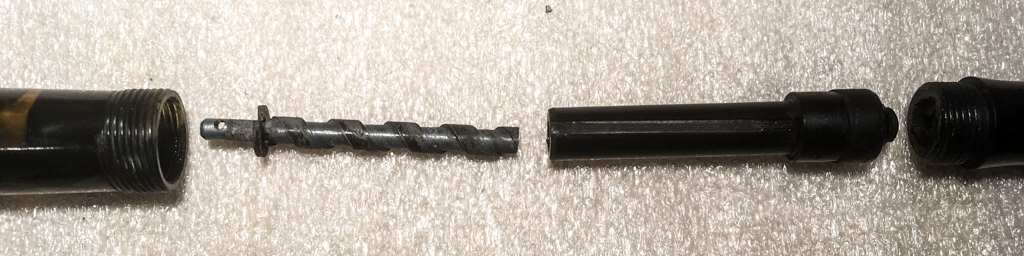
Montblanc 22 (Note that I did not dismantle the piston.) The front end of a Montblanc 22 is dismantled in a similar fashion to the Parker 45 (see below). Montblanc 24 before cleaning (Note that I did not dismantle the piston.) The front end of a Montblanc 24 is dismantled in a similar fashion to the Parker 45 (see below).Montblanc 224 (Made in Denmark)Montblanc 244 (Made in Denmark) Note that the piston cylinder is still inside the barrel. This is basically a tube with a circular hole and a small pin that fits into the groove in the piston shaft (visible in the photo) to keep it from turning. A close-up of the same Montblanc 244. Note that the small washer at the base of the screw is a split washer. There is a notch taken out it to get past the pin when inserting it into the barrel. You may also note that the piston shaft has been slightly twisted. This is due to a little too much muscle being applied to it sometime in the past. It should be straight.
Parker
Parker 45 (For instructions on how to dismantle a Parker 45, see this video.)Parker 65 mk 3. The nib and feeder on this pen MUST NOT be unscrewed from the front. The collector (in blue) must be unscrewed using a special tool from inside the pen (see this page for more information). Rotating the nib and feeder will break a small tab that aligns the assembly in the writing unit. Note that the connector shown in this photo (the threaded brass part on the lower left) is a replacement part – not the originalParker Striped Duofold Junior with the Speedline vacumatic filler. The sac is about to be pushed onto the plunger with a special tool called a pellet pusher, and then folded over. Richard Binder has an excellent description of how to replace the ink sac on a vacumatic on this page.
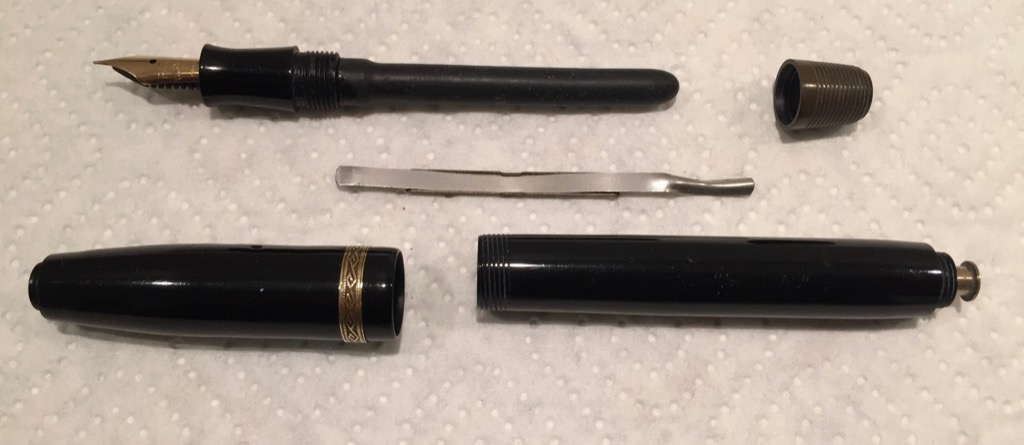
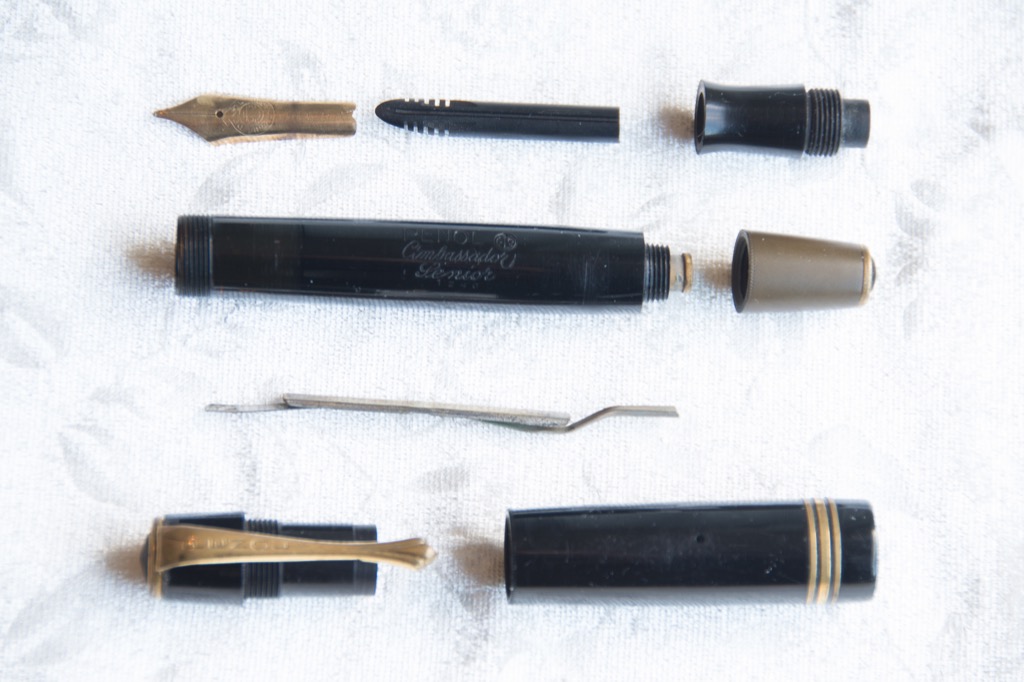
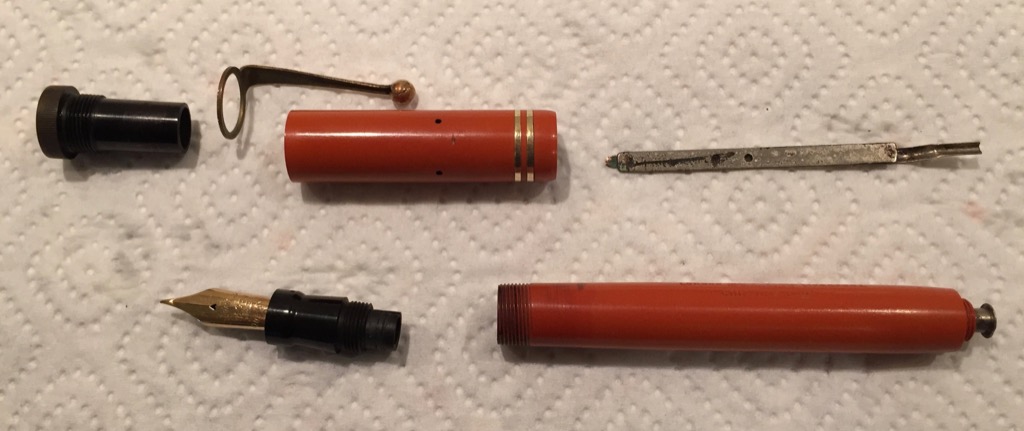
Penol (and Christian Olsen)
John Bull “Special” (Probably made by Christian Olsen in Copenhagen. Note that the clip and finial are missing.)Penol Ambassador Senior
Sheaffer
Sheaffer Targa 1004 section. The threaded metal connector (on the left) is unscrewed from the section (on the right). However, this is not as easy as it sounds. Sheaffer glued these parts together at the portion indicated with the red arrow. In order to separate these, I followed the instructions in Marshall and Oldfield’s Pen Repair book . Initially, I heated the entire thing in 60º C (140º F) water. This did not do the trick, so I ramped up to 10-second long immersions in 66º C (150º F) water. This, with some gentle force, broke the glue seal. (In most cases, dismantling the section is not necessary. It was in my case because part of the filler was stuck up inside it…) Note as well that it is typically considered to be risky to use an ultrasonic cleaner on an inlaid nib, since it may separate the nib from the section. See this page for step-by-step instructions on how to dismantle this pen. Seen here in one piece.Sheaffer Triumph Lifetime No. 1000 (See this page for dismantling instructions). Seen here in one piece.
See this page to learn how NOT to disassemble a Triumph 500.
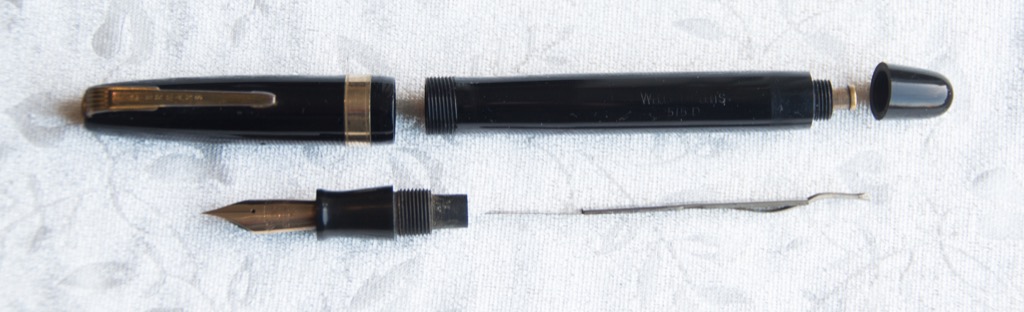
Watermans 515D. Note that the D is a button filler variant. The normal 515 is a lever filler. Typically, the 515 has a friction fit section, but this 515D has a threaded section, as can be seen here. Seen here in one piece.