
Home-made kit
NOTE: I’ve designed a newer version of this coupler, which can be seen on this page.
All of the wooden pens I’ve made so far have been based on heavily-modified kits. The weakest links in these are the plastic threaded couplers that are inserted at the top of the barrel and the bottom of the cap. So, I decided to have a go at making my own on my metal lathe.
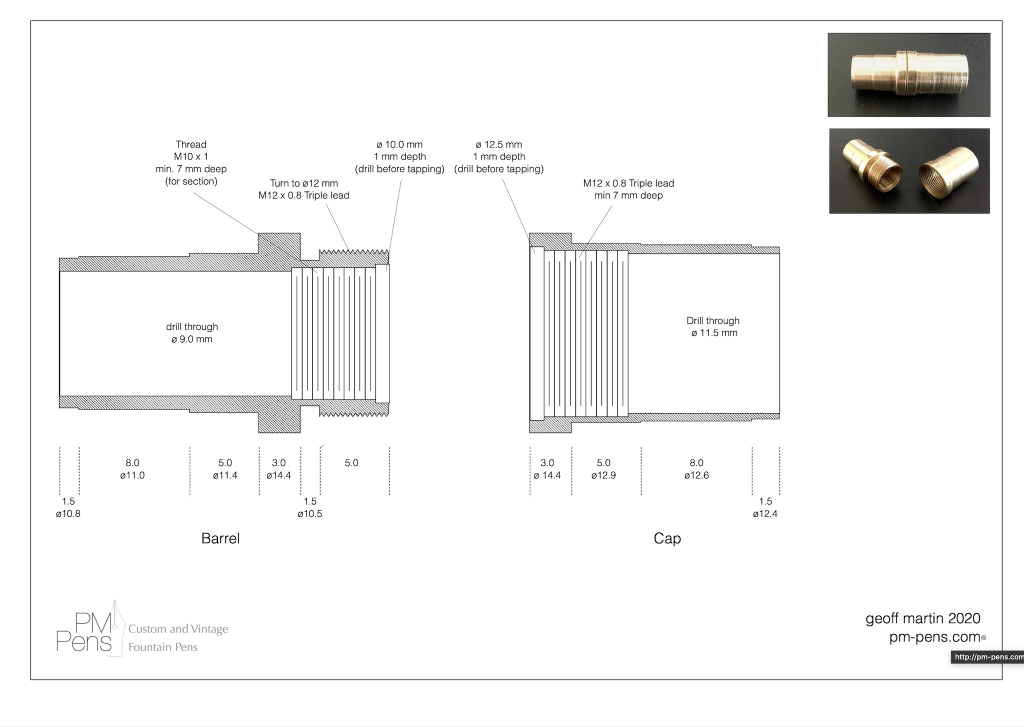
I’ve put the plans for the two components above in case it’s useful for anyone. These are interchangeable with the couplers in the “Churchill” size kits with the #6 nib. I’ve designed this one so that the barrel and cap meet with a flush join (although I put a small break in the two corners where the pieces meet – just to add a line).
Of course, you’ll need two taps and a die to cut the threads easily. I bought mine at Beaufort Ink in the UK. They cut through the brass manually quite easily – as long as I take my time and use cutting oil…
Note that I made the hole through the cap coupler a little big. Normally, it’s recommended to use a 7/16″ or 11.1 mm drill bit for the M12 x 0.8 tap. This is what I do when I’m working with acrylic – however, I find that this is just a little too snug for brass. Also, 11.5 mm gives a little more clearance for the section, if it’s not turned down to a custom profile.