

Repairing a Miller stretch vacumatic fountain pen
I just acquired a Danish Miller Royal 408 today and started dismantling it – this reminded me of the problems I went through fixing a Miller 698 some time ago. So, I thought that I’d re-post a tutorial on how to fix the “stretch-vacumatic” filler system (whilst taking the opportunity to move the page from my old site at tonmeister.ca to this site…).
This filling system was invented by Johannes Iversen (of the Miller Pen Company in Copenhagen according to this document). The patents can be found here (in English), here (in Danish), and here (in German).
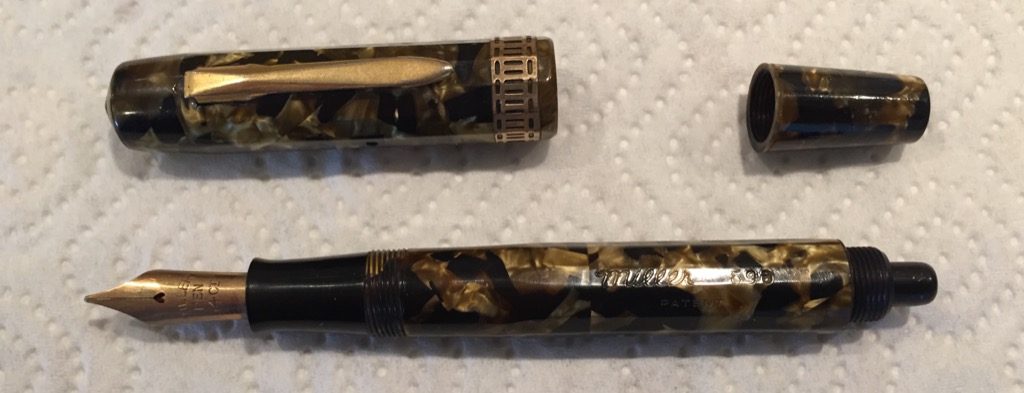
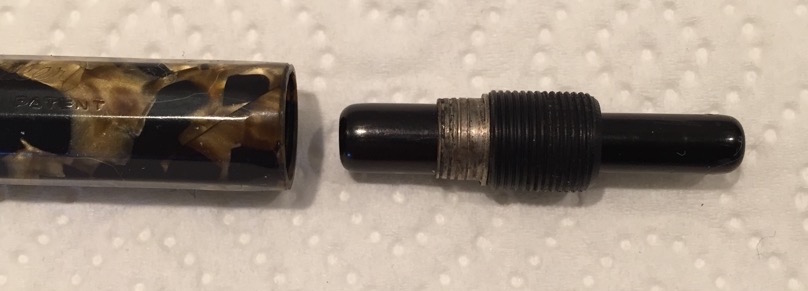
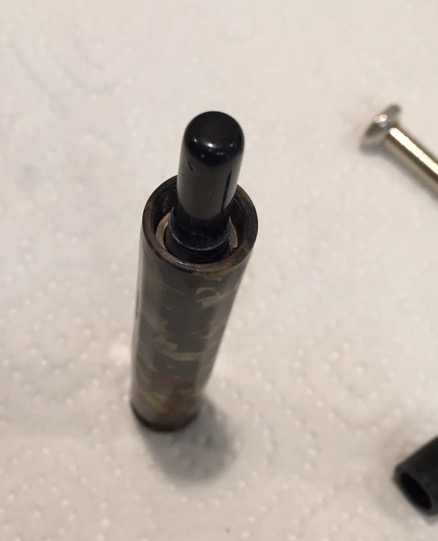
The Miller 698 before dismantling. The Royal is very similar. It’s typical for the plunger (the button at the end of the barrel) to have no spring when you start working. It may even be pushed into the barrel and not visible from this angle.
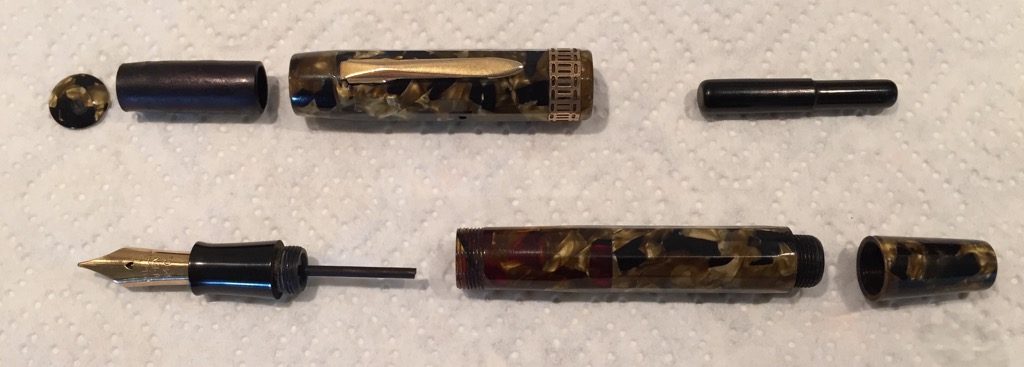
When you first take it apart, it looks like the pieces above (I obviously haven’t dismantled the section assembly in this photo). Notice that the plunger on the top right comes out of the front of the barrel. There is no sac attached to the section, nor is there any kind of spring to hold the button in. Note, however, that the pen is not yet fully dismantled.
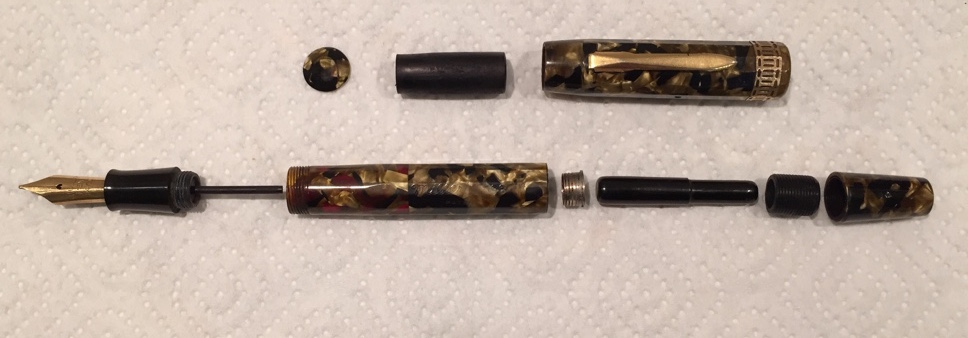
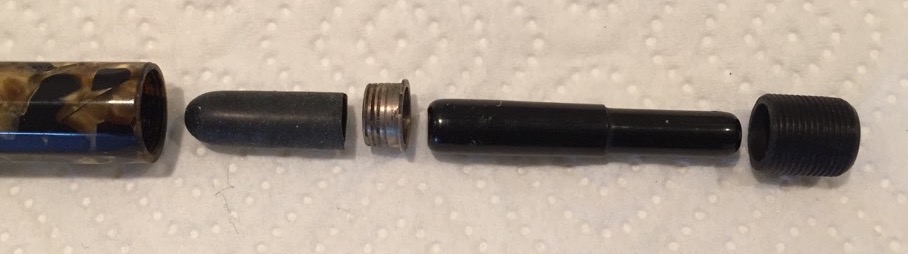
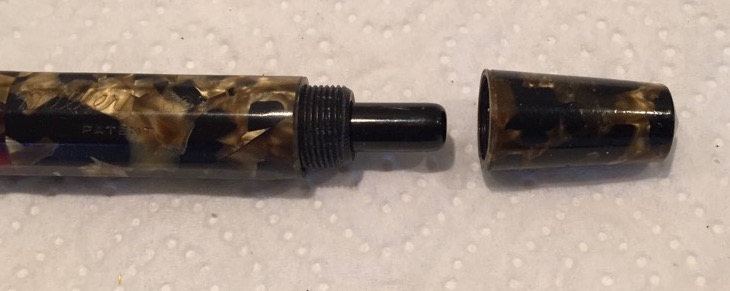
Above: A fully-dismantled stretch vacumatic, after cleaning. The threaded collar (second from right on the bottom, next to the blind cap) unscrews from the inside of the barrel. The metal flange can be pushed out of the barrel from the front (the left-hand side, in this photo) with a wooden dowel that just fits inside the barrel. (You may need to use heat and a little force to do this – the flange is probably in there pretty tightly. I’ve put some extra hints on disassembling a stretch vacumatic here.)
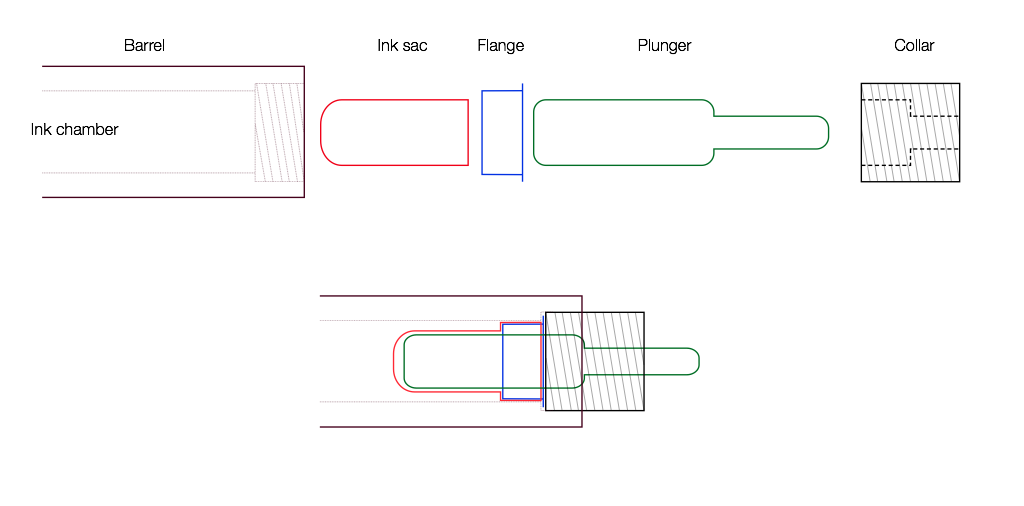
A diagram of the components of the stretch-vacumatic filling system.
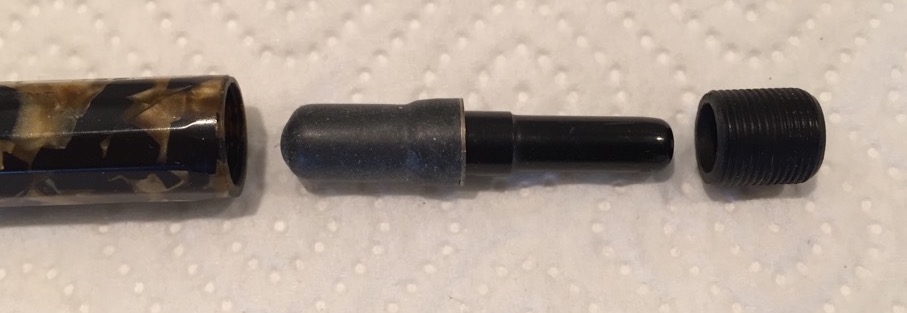
Beginning re-assembly. This shows the plunger, collar, and flange without the sac.
Trim the end of a #18 sac (recommended for a 7 mm diameter nipple) as shown above. In order to keep the sac from riding up on the flange when you’re inserting it in the barrel, it is sometimes useful to glue the sac to the flange with amber shellac – just to keep it from moving.
Slip the sac over the plunger, roll back the top of the sac, put the flange into position (over the top of the plunger), and then roll the sac back on over the flange. The result is seen below.
Note that the plunger can still just fall out of the sac/flange assembly at this point since it’s the collar that keeps in in place..
Put a little silicone grease on the inside of the barrel where it will make contact with the top of the sac and then insert the sac/flange assembly back into the barrel, with a wooden dowel. The end result is shown below.
Put some silicone grease on the plunger and then place it in the sac as shown below.
Then screw the collar back on. Note that on some Millers, the collar is tapered on the end that screws into the barrel. The one shown in the photos on this page is not.
Remember that you’ll also need some silicone grease around the threads of the section, since the barrel is filled with ink.
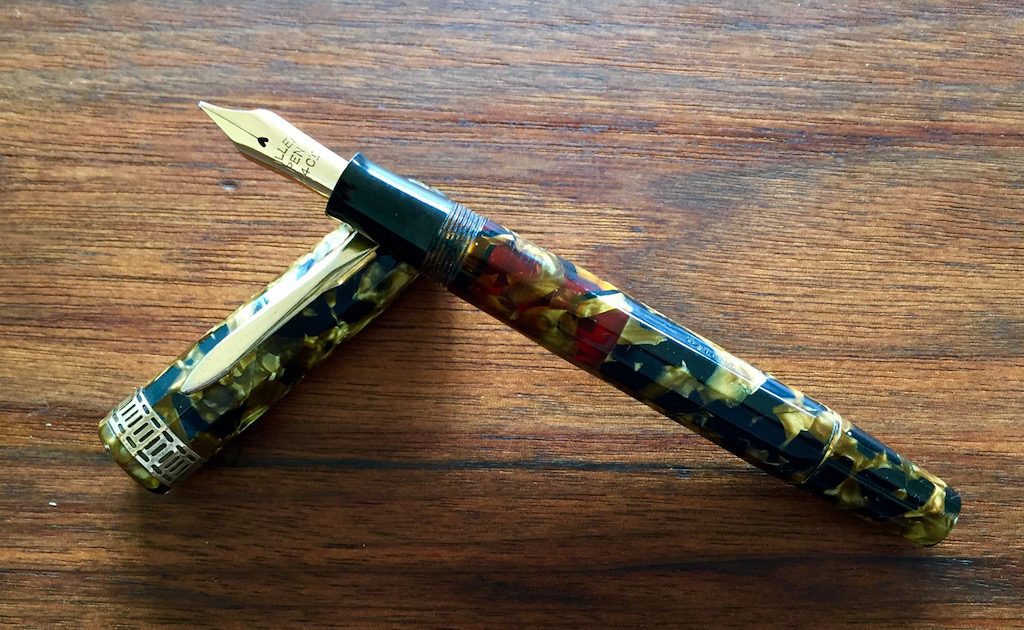
And voilá – the end result. This 698 has a semi-transparent ink window so that you can see the quantity of your ink reserves.
Note that there is a discussion about this kind of filling system on this page at the Fountain Pen Network site.