
The Petley: Construction
This is a pen made for a friend who makes hand-crafted knives in the Scandanavian tradition. I already own one of his knives, and it was time for me to return the favour. This is my most complex design yet – so this page is just documenting the process (mostly so that I don’t forget in the future…)
The Design
The design is a typical cigar-shape, built on a Bock 250 nib, feed, and housing. The nib is custom-engraved and gold plated by fpnibs.com. The complexity comes from the sandwich of the materials, as I’ll explain below.
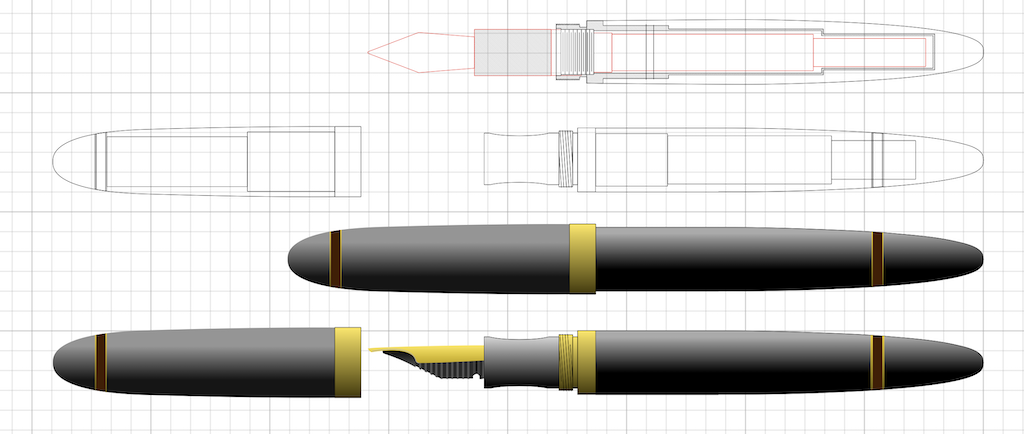
The nearly-final design idea. Some details will change as I’m making the pen.
I rarely follow my drawings for anything other than making sure the outside doesn’t break through to the inside.
Internals
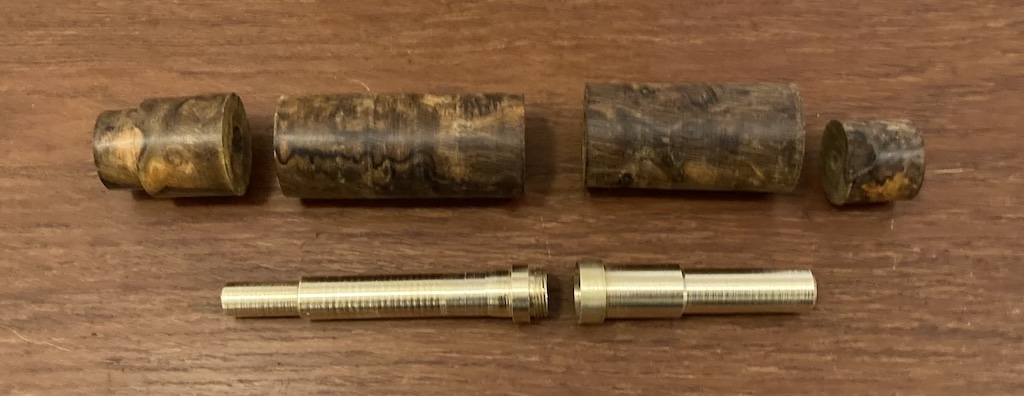
The first step was to turn the internal components out of brass. These are essentially extended versions of the two parts I’ve shown in this posting, so I won’t get into the details of these.
Wood
The wood is a single piece of desert ironwood purchased from Arizona Ironwood. The black/gray parts in the design shown above are the wood portions, and the plan will be to ensure that the lines in the grain align when the pen is capped.
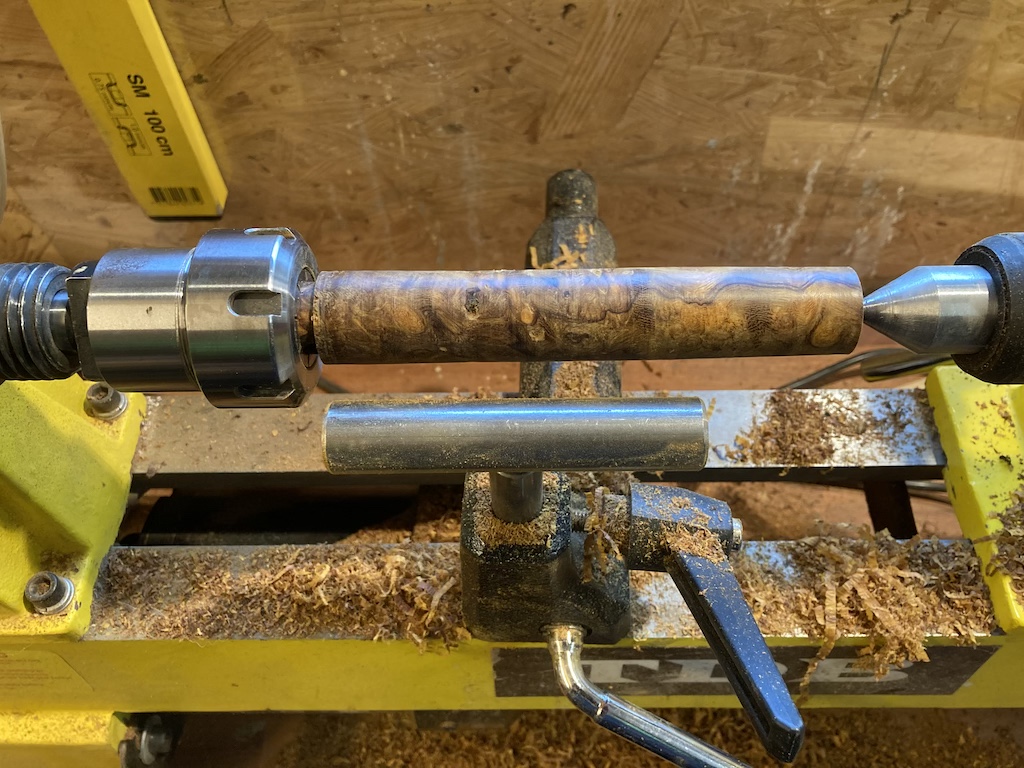
In order to turn the wood, I started by bringing the blank down to a cylinder so I could mount it in a collet instead of the jawed chuck for more precision.
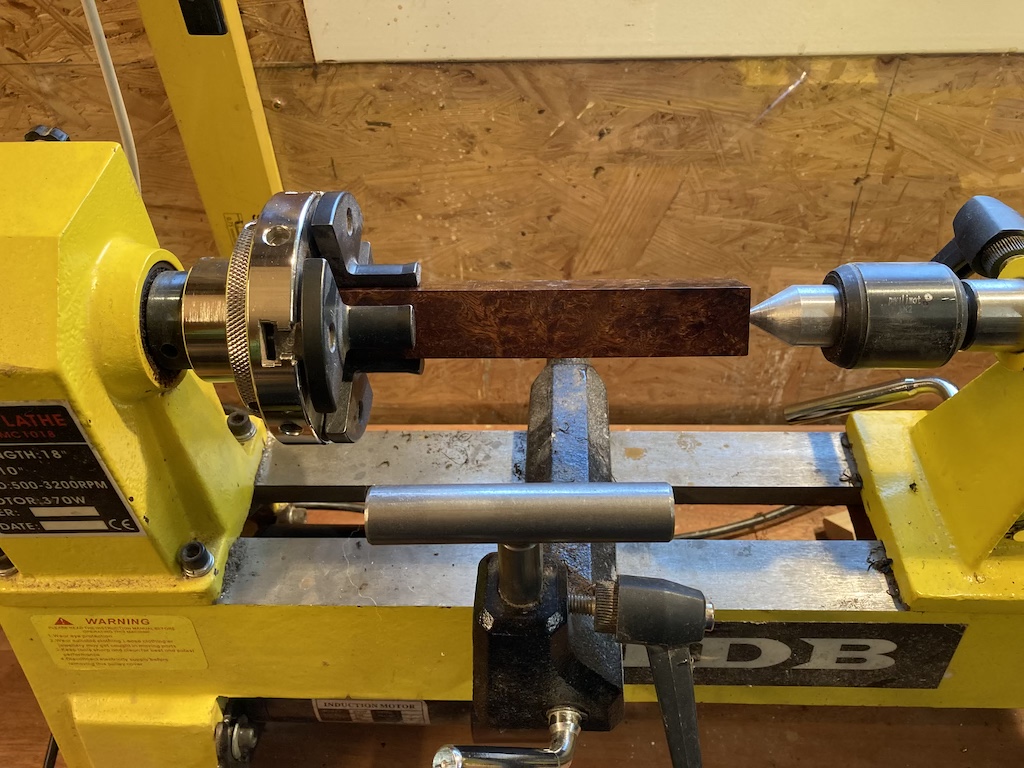
The blank in the 4-jaw chuck, ready to start.
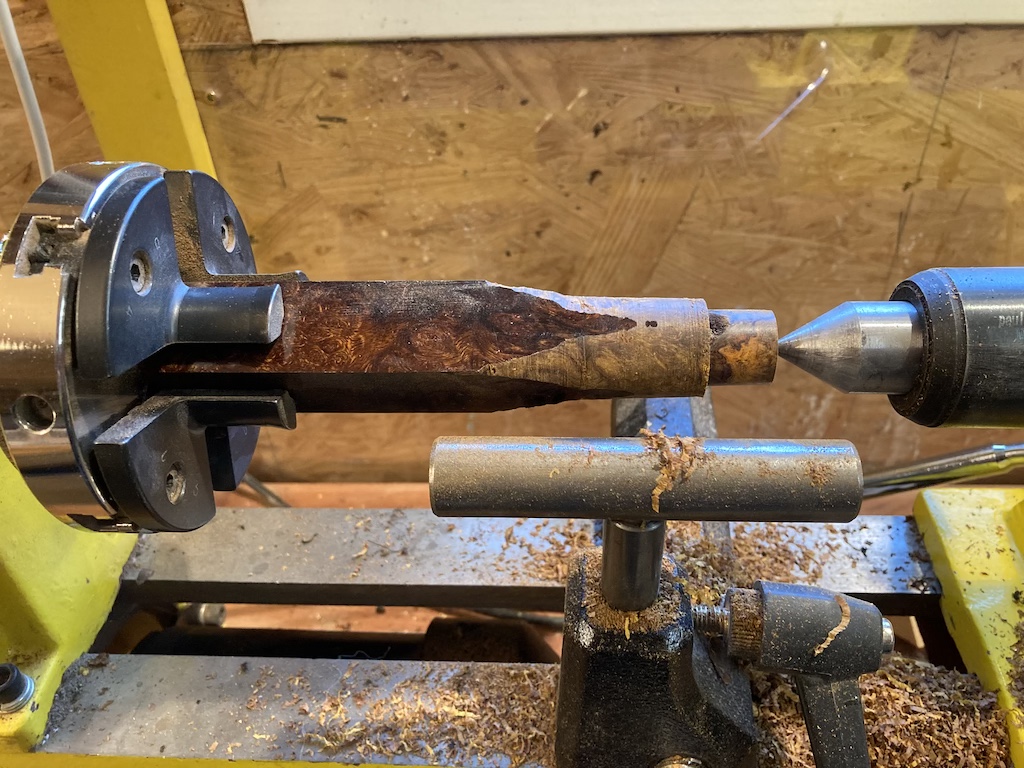
The end was brought down to just under 20 mm diameter so I can fit it into my collet. Note the small bit of dry rot on the right. Hopefully this doesn’t extend very far and won’t be a problem later…
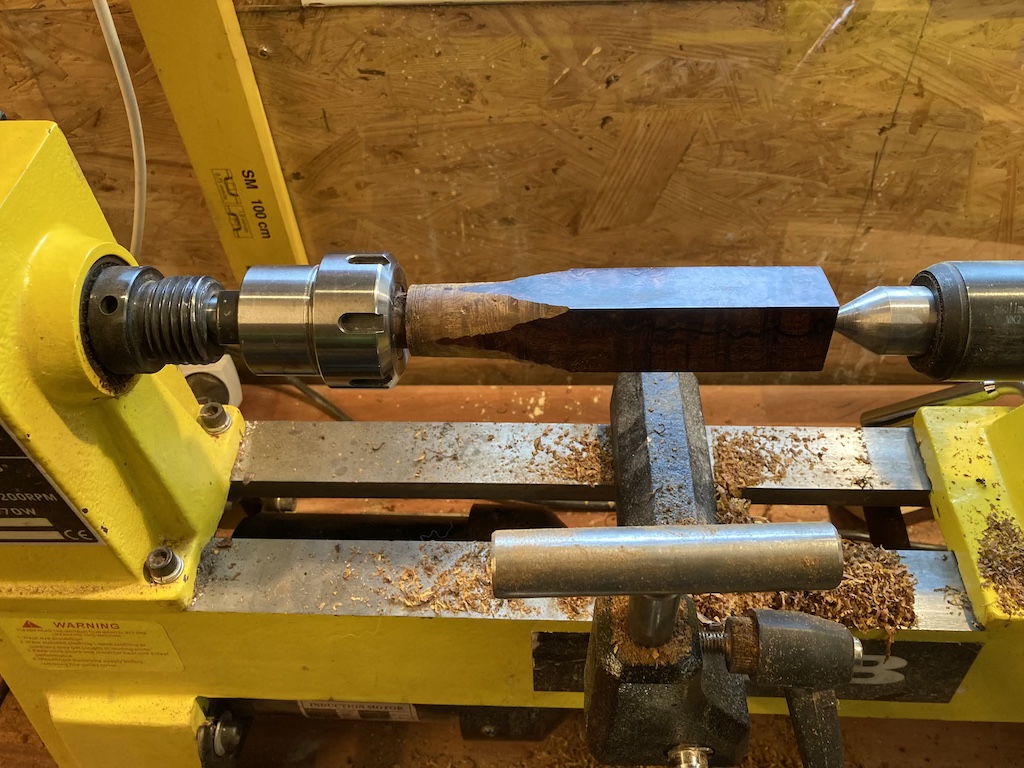
The piece is now flipped and ready to bring down to a cylinder
The result after bringing it down to the largest-possible-diameter cylinder.
I want it round, but big enough to have the strength for boring out the centre.
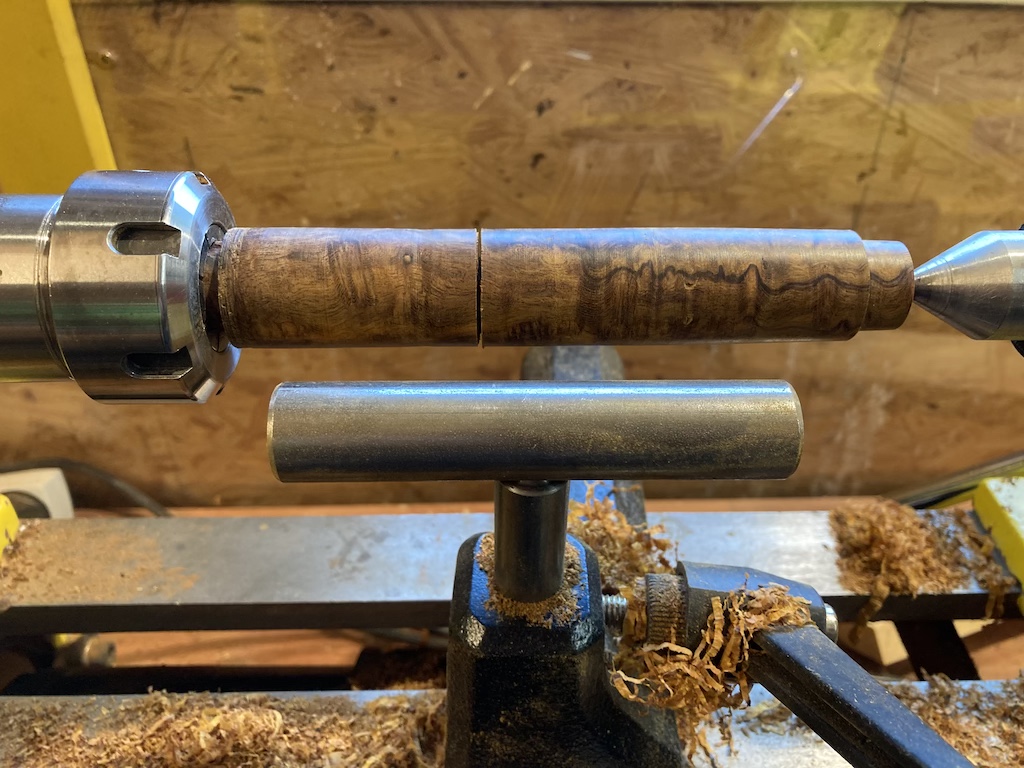
The cut where the barrel and the cap will separate. This was marked with a lathe chisel while turning, and then sawed using a Japanese flush-cut saw for the minimum possible kerf (less than 1 mm).
Once the wood was cut into the two pieces for the barrel and cap, I moved over to the metal lathe to have a little more control for the next steps.
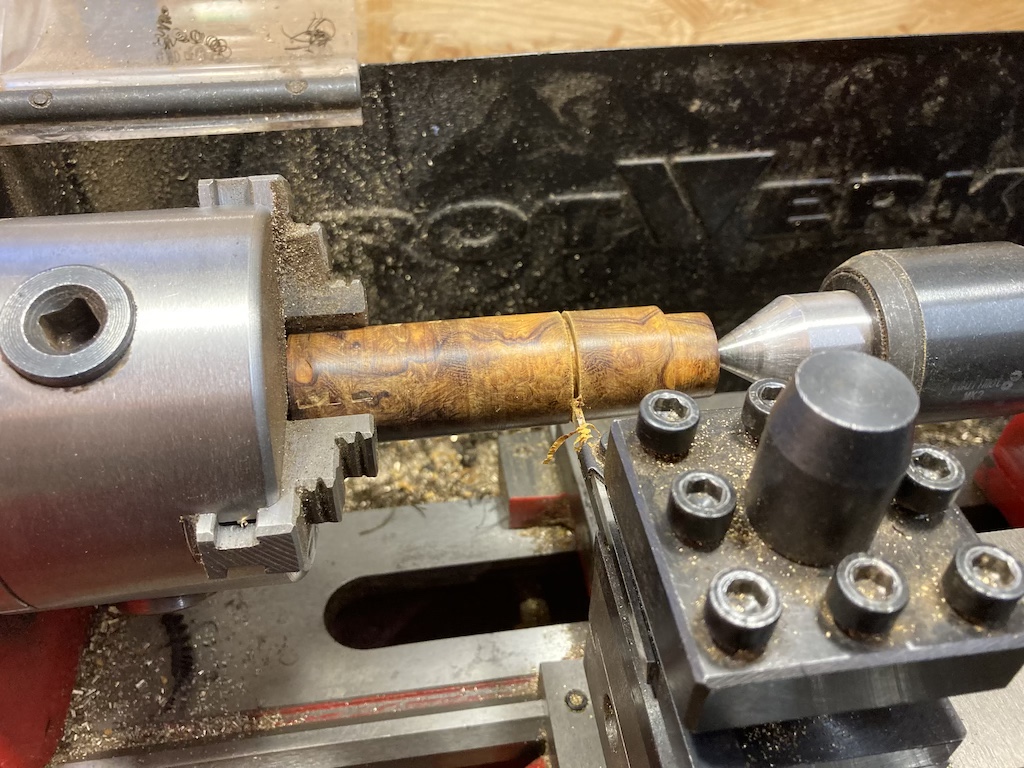
Cutting the barrel into the two portions using a parting tool on the metal lathe.
The cap was separated in the same way.
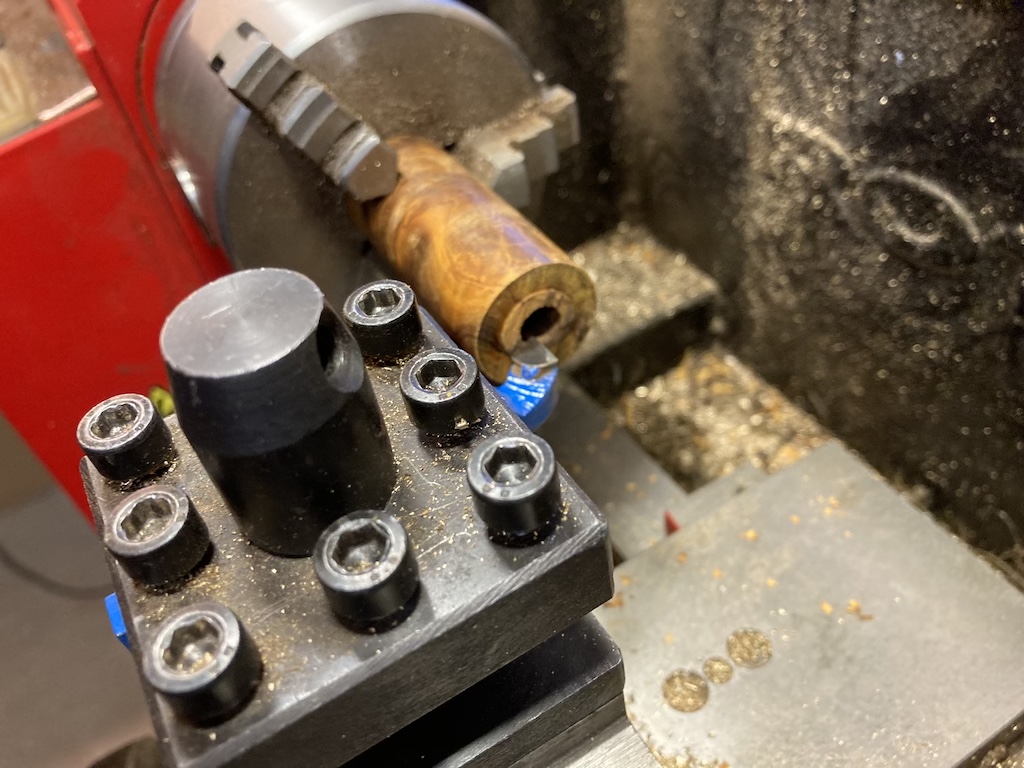
The barrel has been bored from the opposite end due to the fact that it is drilled with 3 increasingly smaller diameters. This photo shows the way the “facing” was done on the end to ensure that it was flat and perpendicular to the hole axis. All ends were faced twice (about 2 weeks apart), since the wood moved a little (about 0.1 mm) as the insides were exposed to the outside world.
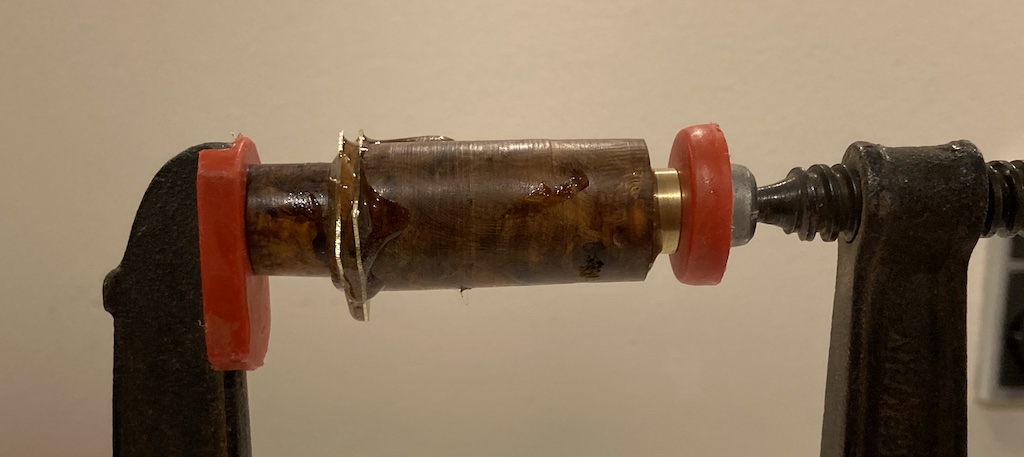
The wood an internal brass pieces mostly-done. The cap is on the right in this photo.
Looking back at the design, you’ll see that there are three slices inserted into both the cap and the barrel. These are 0.7 mm thick brass, 2.5 mm thick mammoth tusk, and another slice of brass. So, the next step is the mammoth tusk while I wait for the brass to be delivered.
Mammoth tusk
The challenge here was to slice the mammoth tusk into 2.5 mm wafers from the same piece. This was done by making a jig on my 3D printer that had a snug insert for the tusk, and a 1-mm thick slot for a saw to go through it. The result is shown in the action-shot, below.
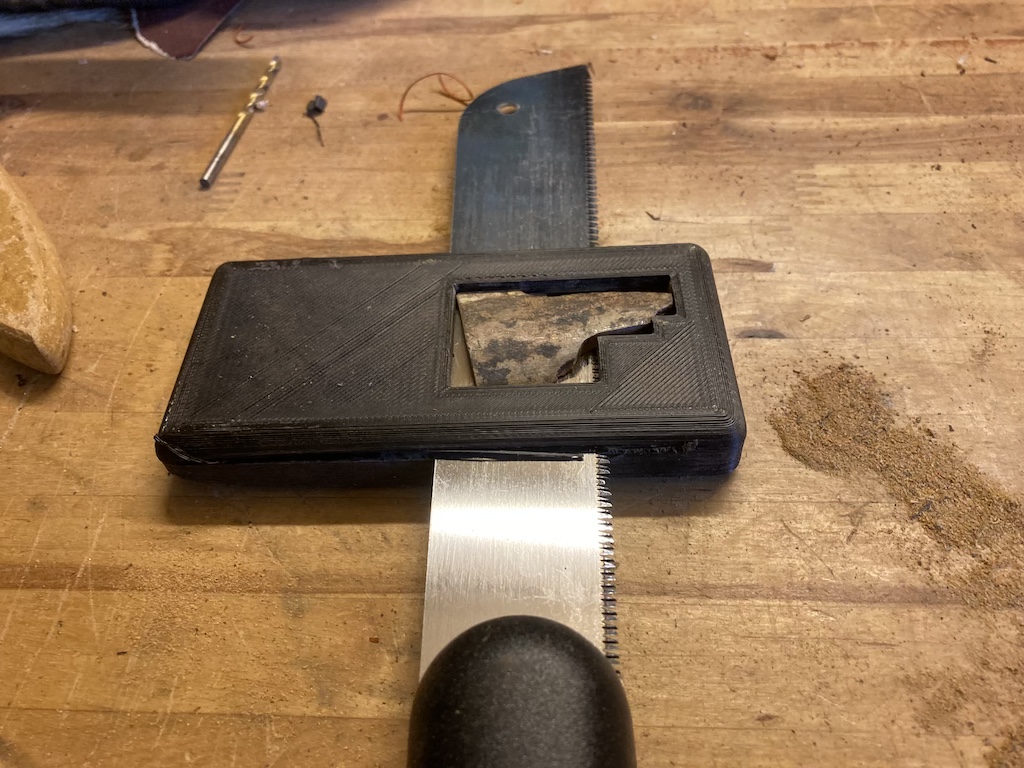
Sawing a slice out of the mammoth tusk. The slice to be used is under the saw, which has a 3 mm clearance off the bottom.
(Note: It’s always a good idea to wear a mask when working with mammoth tusk – or anything dusty for that matter – even when you’re just sawing…)

The two slices to be used in the pen, and the remaining mammoth tusk on the left. This is the result after sawing – no clean-up done yet… (The remaining part on the left will make a return at the end of the story…)
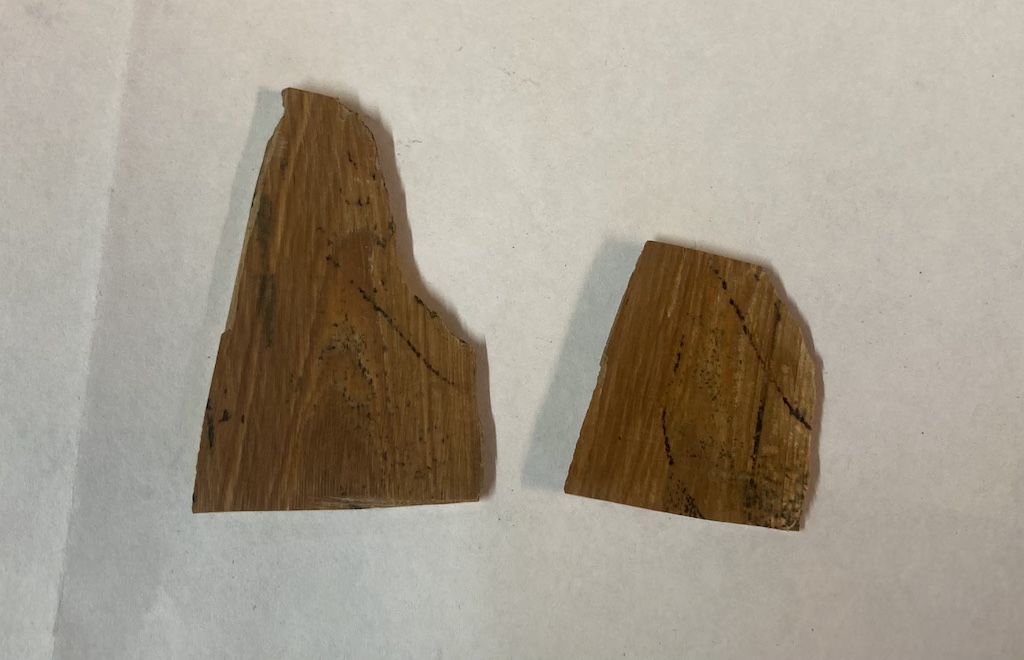
The same two slices after filing them down to 2.5 mm thick and making sure that the sides are both flat and parallel. This just takes patience and time. Actually a LOT of patience…
Brass slices
The brass portions are bored and cut from 0.7 mm thick sheet brass from linaa.dk. Initially, I tried to just bore the holes I needed (4.2 mm for the cap pieces, and 8.5 mm for the barrel) and then cut the brass with snips. This made a mess of the job (as you’ll see below…) because the brass was no longer flat – and therefore it would not glue together nicely. So, I had to make a jig.
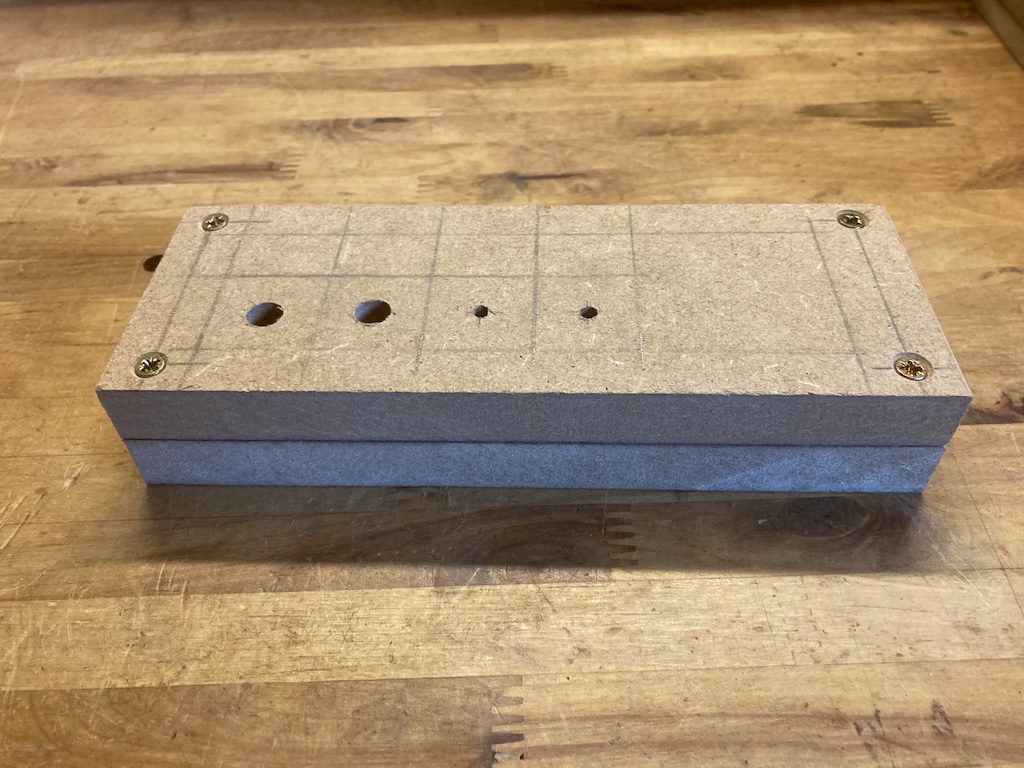
The brass sheet is sandwiched between the two pieces of MDF to hold it flat for this part of the process. Drilling first…
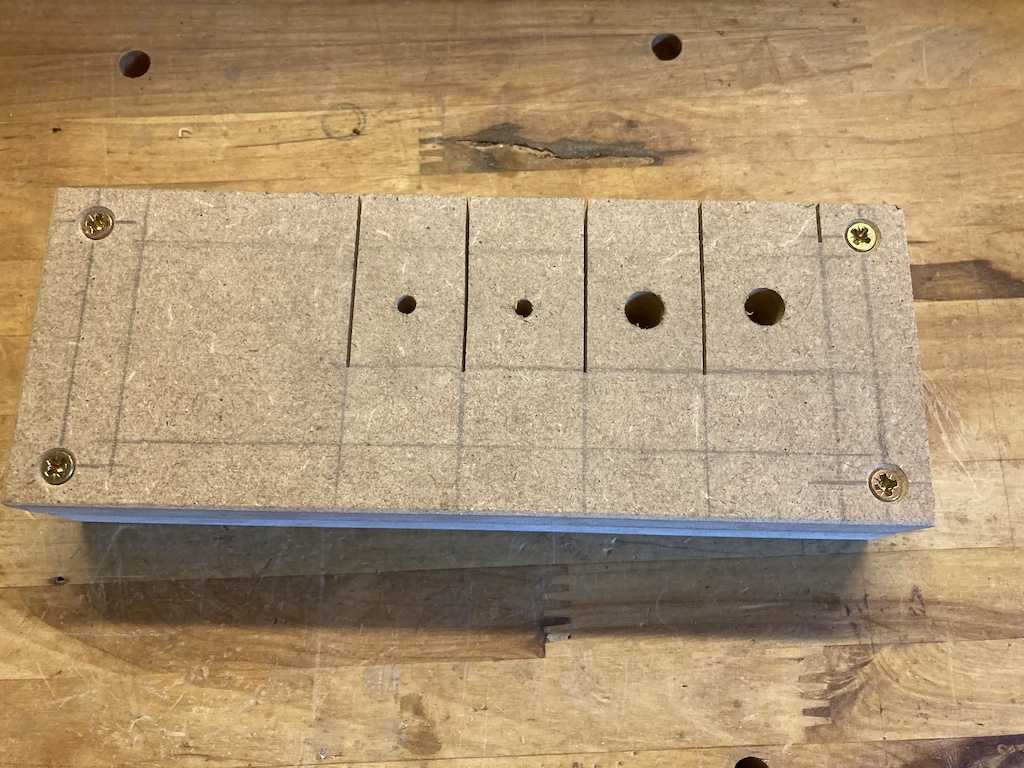
… then cutting with a wood bandsaw.
As you can see below, the end results (shown on the right) are much cleaner than the first attempt. Live and learn…
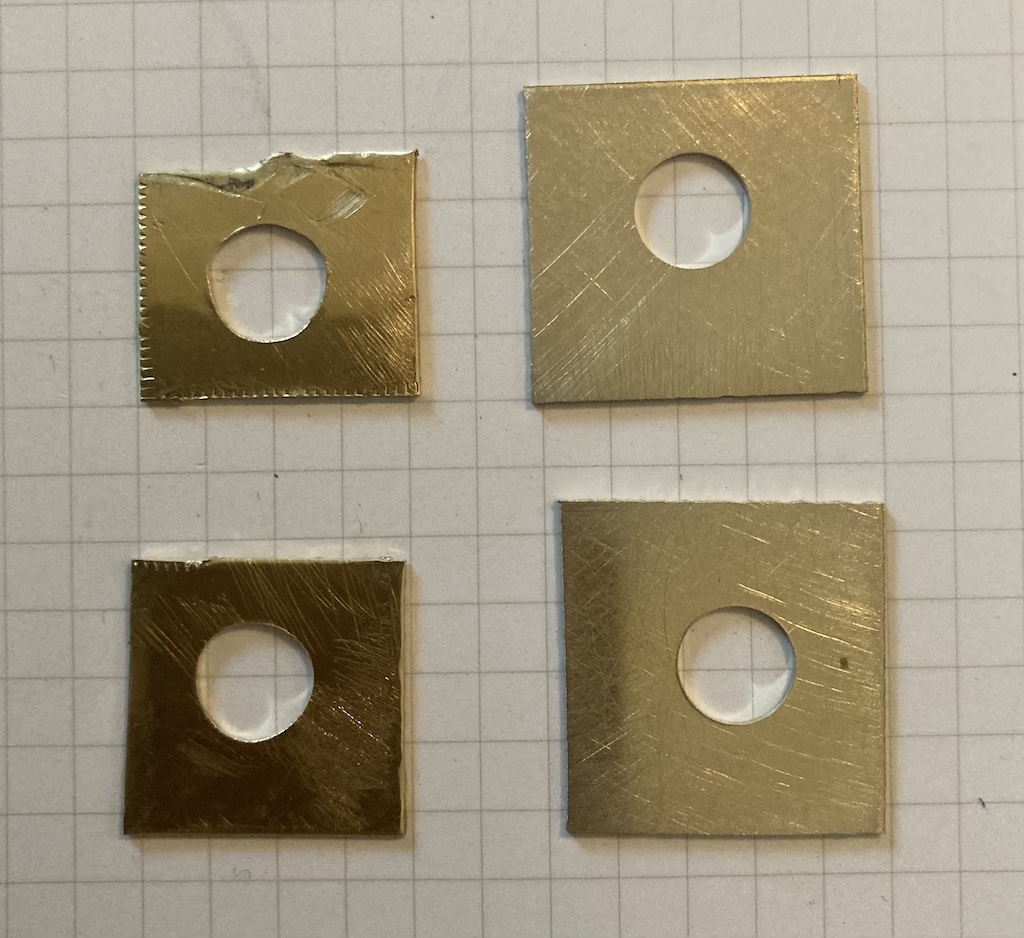
The two on the left were my first attempt to bore and cut the brass without the jig. The two on the right are the result with the jig. Jigs are good.
Some leftovers
In order to ensure that the cap’s finial is well-secured, it will be secured to the brass insert using a countersunk M4 bolt running through the sandwich. This means that there must be something inside the cap end into which the bolt can be screwed. This is a typical insert, but since the normal one out of the box is too big, I used the metal lathe to not only reduce the height but also the diameter of the outside wood threads. The “before” (on the right) and the “after” (on the left) are shown below. (It will not be possible to unscrew the top afterwards, which will mean filling the screw head with a dab of epoxy to keep people from trying to unscrew it in the future.)
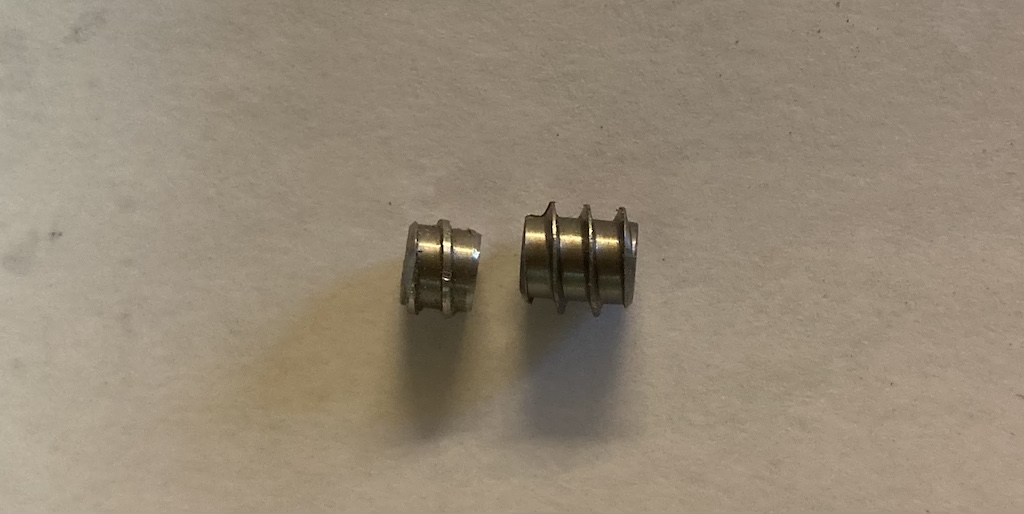
I left enough outside thread on the insert to give the epoxy something to hold onto.
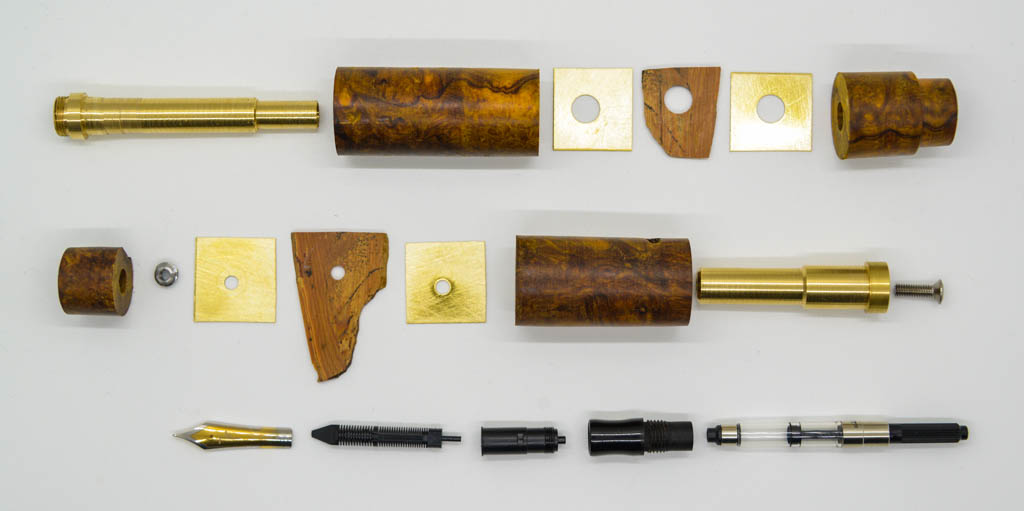
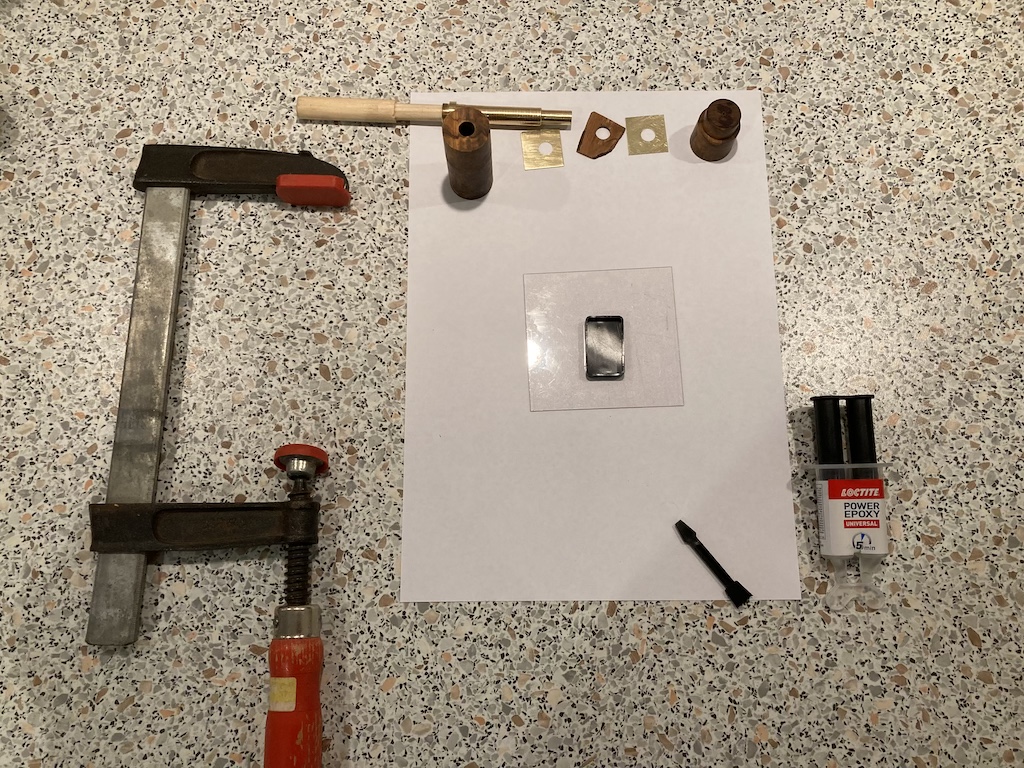
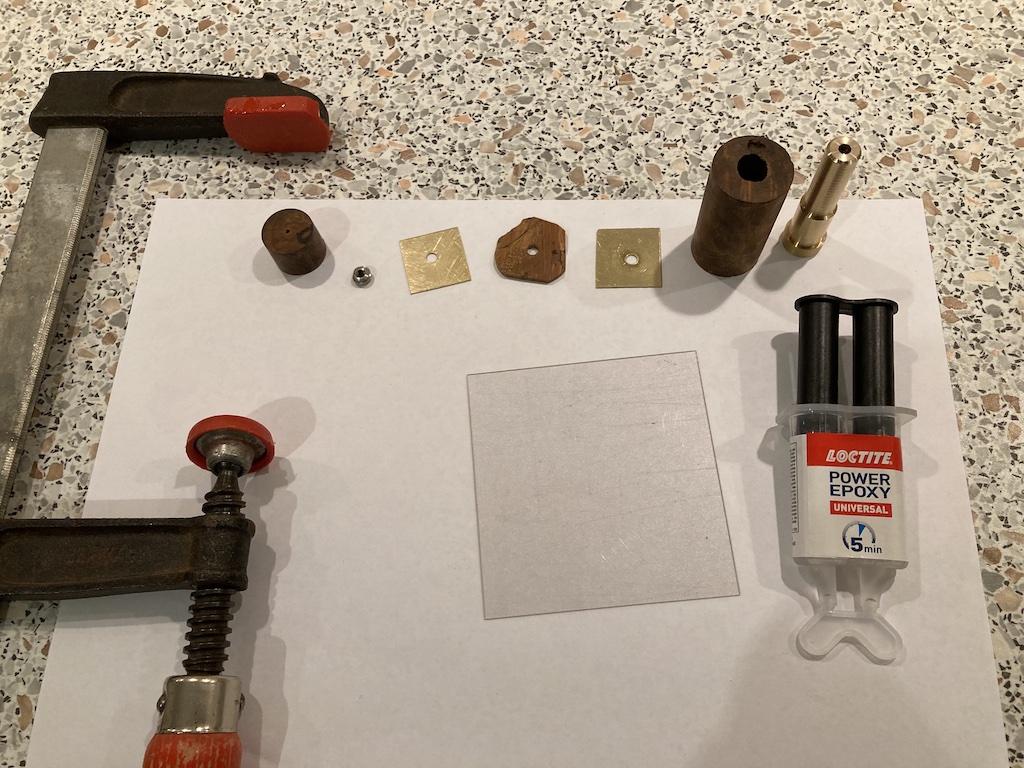
All the parts are more-or-less ready for assembly.
In the photo above, the barrel is the top row, the cap is the middle row, and the business-parts of the pen is the bottom row. The three parts of the Bock 250 assembly are shown on the left of the bottom row. I custom-turned the section grip from an ebonite rod purchased from P.E. Hermann, a pipe-making supply online shop in Kolding, Denmark. (I’ll do another posting about making section grips, someday) It’s threaded with an M10 x 1 to screw into the barrel’s brass insert. The cap is held in place with an M12 x 0.8 triple-thread (using a die purchased from Beaufort Ink back in the days before Brexit made everything worse for everyone) to ensure a good grip with few turns to get it secured.
Assembly
The first step in the assembly was to epoxy the barrel portion. (The cap has to wait until later so that I can align the wood grain.)
Ready to glue
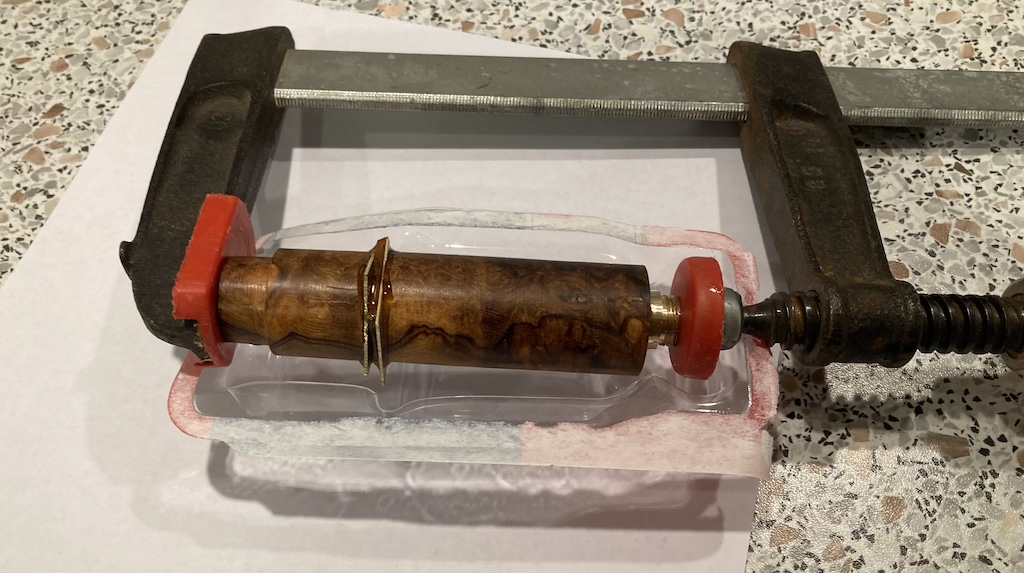
Now I wait…. Note the alignment in the wood grain.
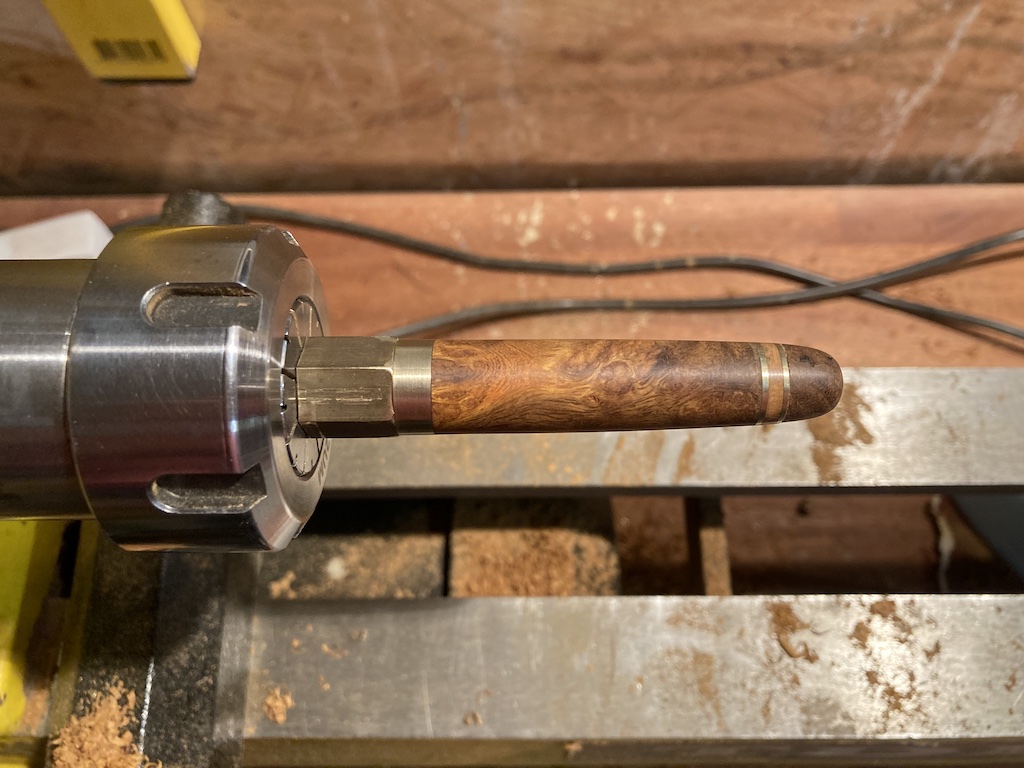
Once the epoxy had cured, I put the piece in a custom M10 x 1 screw chuck that I made out of hexagonal brass, and mounted it on the wood lathe to secure it. First, I filed down the sharp corners of the brass and the irregular protrusions on the mammoth tusk so that hitting the chisel wouldn’t be too much of a shock when it started turning on the lathe.
Then, it was over to the metal lathe to bring the piece to a cylinder of uniform diameter. The result (after just a little sanding to highlight the grain) looks like this:
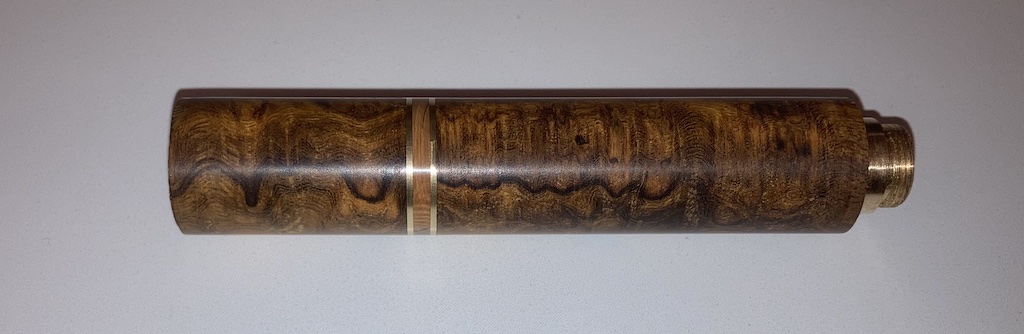
The same piece a little later…
So, that’s the barrel, ready for final shaping.
In order to ensure that the grain lines up correctly when the cap is eventually screwed on, I’ll have to finish the barrel first (or at least bring the top couple of millimetres near the brass end down to the final diameter). This is because the edge of the cap comes down over the barrel, and if I screw it on now, the brass on the cap end will bottom out on the wood end grain, which will be about 5º – 10º short of the final rotation.
After taking a couple of mm off the top of the barrel, it was easy to determine the alignment for the grain. This was marked on the brass and the wood, so that it would be possible to assemble the cap without the barrel attached.
Everything’s ready to come together. The brass insert, and the two wood components have been marked for alignment.
Time to wait again…
Once the epoxy in the cap had cured, it also had to be turned down to a cylinder, resulting in the “starting point” shown below.

The cap and barrel, assembled, and ready for turning.
The cap was the first to go on the lathe. This was initially profiled using the metal lathe, with the final shaping done on the wood lathe. An 8 mm diameter pin was left protruding from the top of the cap to hold it in the end stock until the last stage. This was then sawed off and the end was shaped initially with a file, and then with sandpaper. After sanding from 120 grit up to 800 grit, the result looks like this:
The cap after the final shaping to be done with chisels, and with the first round of filing and sanding done. It was nice to find out that the knot, visible in the previous photo, didn’t extend all the way into the centre of the block.
When sanding on the lathe, I typically start with a grit, sanding with the piece turning, which makes scratches around the piece. Then I stop the lathe, and sand with the same grit by hand along the length of the piece (which is typically with the grain of the wood). Then I move up a grit and repeat the process. This helps to ensure that you eliminate the scratches from the previous sanding as you move up to finer and finer grits.
As you can see above, 800 is not fine enough for the brass – but this is just the first round of sanding. After this, I took the cap off the lathe and checked to ensure that the curve is monotonic from end to end. In other words, I’m looking for flats and dips by “rolling” the cap along its length on a flat surface. Doing this with the cap shown above indicated that there was a slight dip just above the cap band – which can be seen in the photo above. It’s just a fraction of a millimetre, but it’s enough to notice. This will be fixed on the next round of sanding.
Two additional concerns to keep in mind when sanding a piece like this are that:
- the different materials have different hardnesses, and therefore sand down at different rates. This means (for example) that you have to be a little careful where the wood meets the brass, since the wood disappears faster.
- When sanding, the brass dust can get into the pores in the wood, and especially the mammoth tusk, leaving dark streaks. You just have to be a little careful to make sure that you don’t sand the wood or tusk with paper that is loaded with brass.
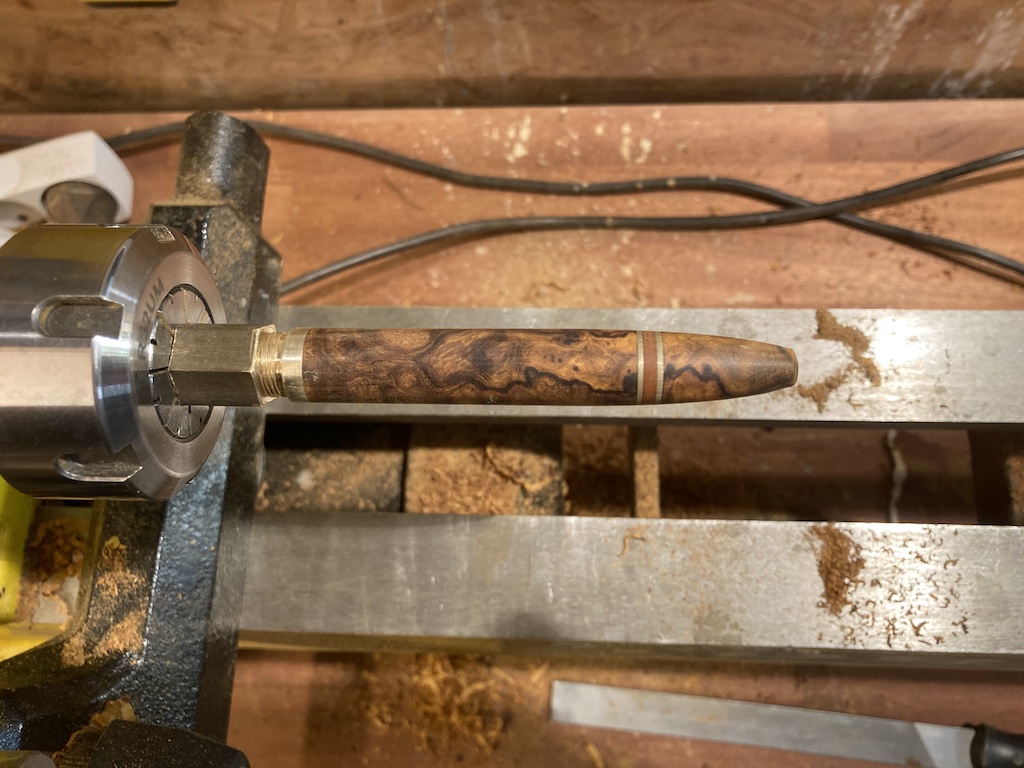
The next step was to turn the barrel to the nearly-final shape. In order to ensure that there is enough wood between the inner sleeve and the outer surface, I started by measuring tangential lines to the curve at 10º, 5º, and 2.5º slopes. These are cut on the metal lathe, with a reference to where the tangents start relative to the surface of the starting cylinder.
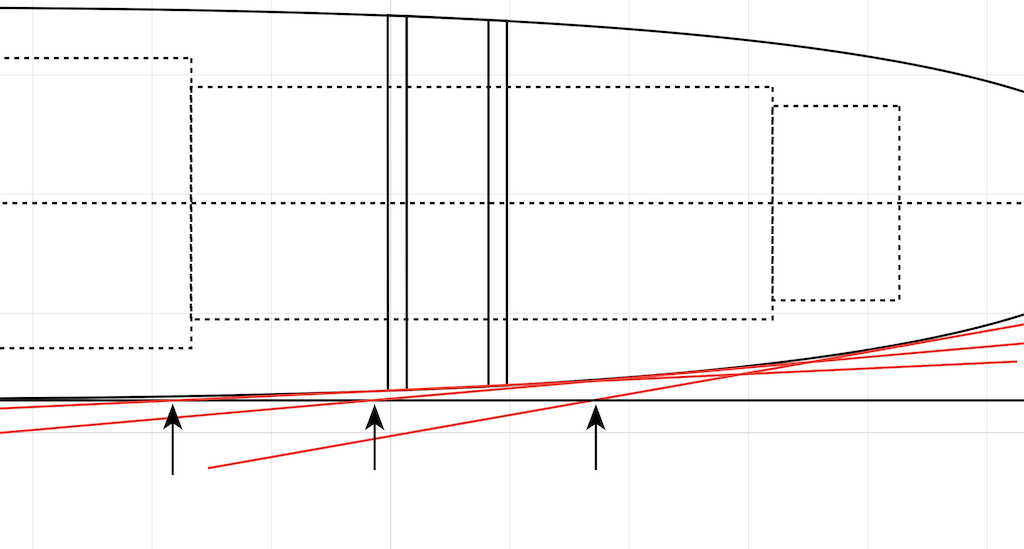
10º, 5º, and 2.5º tangents to the curve, noting the starting point on the surface of the cylinder.
The 10º cut is made first, to ensure that the reference points for the other tangents aren’t taken off in the process…

The 2.5º tangent finished.
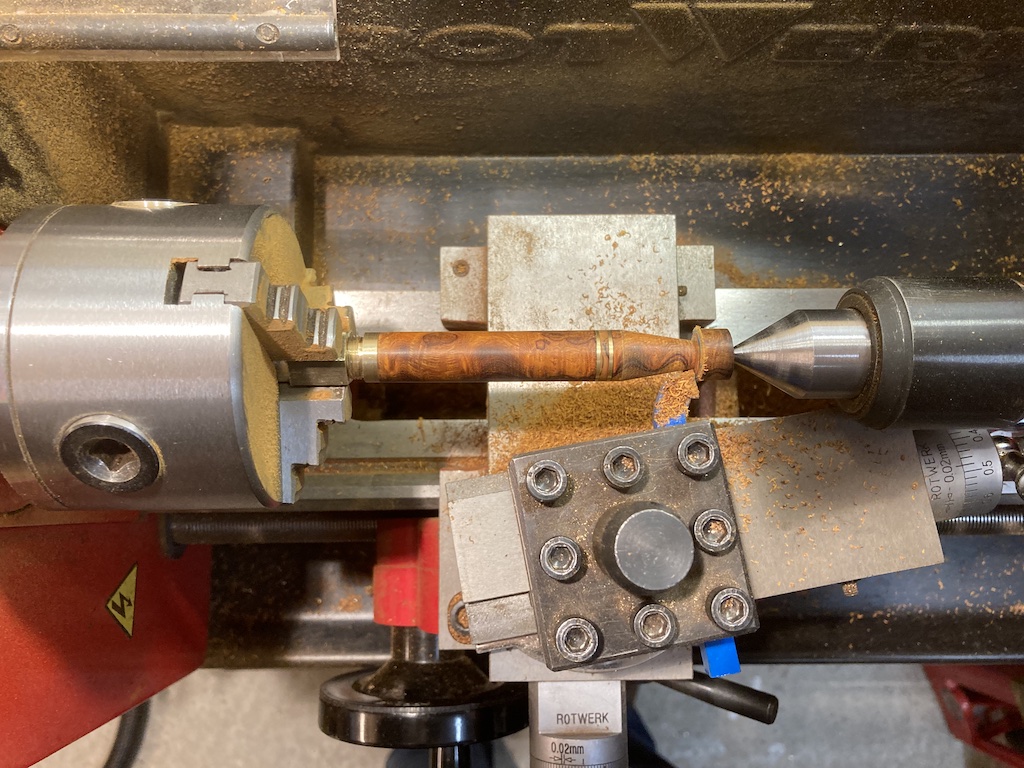
Then it was time to move over to the wood lathe for final shaping by hand, and the initial sanding (ranging from 120 up to 800 grit) using the same procedure I described above.
Once that was done, it was time to cut off the end with a Japanese saw, and then use a file with the lathe turning at its slowest speed to do the nearly-final shaping of the finial.
The barrel after sawing off the end post, but before starting the final filing and sanding of the finial.
Final sanding and polishing
After all that, I let everything sit for a day or two, then it was back for the final sanding. The wood moved slightly, and the brass didn’t, so it was good to let things relax a little.
Starting at 800 grit again, and then working my way up to 12,000 grit pads, each time, sanding perpendicularly before moving up a step.
Following this, I applied three coats of Mylands friction polish, (from Trædrejerbutikken in Odense, Denmark) covering the brass, wood, and mammoth tusk, except for the threaded parts. These I leave unfinished, which means that they’ll probably tarnish slightly over time.
After the polish was on there, there was no more sanding or polishing to be done, apart from some extra turning inside a clean paper towel to heat things up a little…
Lastly, I used the “scrap” piece of mammoth tusk to make a pen pillow by filing it with a round file with roughly the same diameter as the pen, and then final smoothing with a small, fine half-round riffler.
The final results can be seen here.